Print
Request clarification via email
When a case has been assigned to a drafter, if there is not enough information in the case details, then a request for more information can be sent to the correspondent. At this stage, the clocks will be stopped and will not be recalculated until the correspondent has sent in the required information.
To ask the correspondent for more information via email, follow the steps below.
- Sign into eCase. Refer to the How to Sign into eCase section.
- Go to your Workbasket and click on the Manage link, in the Actions column, on the case you require clarification for.
- Go to the Correspondence section on the Case Details screen and click on the
Send Clarification button. The Send Clarification popup window appears. The Clarification Method field will be defaulted to email from the Reply Preference field on the Case Details screen. - In the Address Replies To/Send From field, you have the option to select an email you would like to send the Clarification email from. Your email address will appear along with any emails that have been entered in Mailboxes using a Mailbox Type of Send On Behalf Of for the team associated to the case or at a team higher in the organisation structure hierarchy.
NOTE if there are no additional emails set up in the Configuration Options, your email will be pre-populated in the Address Replies To/Send From field. - If an Email address has been entered in the Correspondent Details section, this will pre-populate the To field.
- Optional: The Email Template field will appear if there is more than one Email template to use for the clarification. Select the relevant template by clicking on the drop down arrow.
NOTE The text can be viewed in the Body section. - To edit the Subject line, click on the Edit Subject link.
- Review and update the Body of the email as required.
- If required, in the Attachments area, select any relevant case files to attach to the email.

- Click on the Preview/Send Email button to check that all of the mail merge fields work and that the email is correct.
- If you are ready to send the email, click on the Send button. If you need to amend any of the details, click on the Back link to go back to the Prepare Email pop up window.
Once the email is sent, a copy of the email will be available in the Correspondence section at the bottom of the Case Details screen.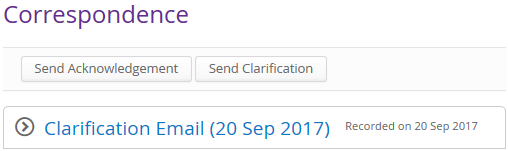
Click on the arrow icon to expand the information and view the email that has been sent - On the Create Draft tool bar, select the Clarification Needed button. The Clarification Needed pop up window appears.
- Optional. Add a comment that will appear in the Notes section of Case Details.

- Click the Submit button.
The case moves to the Awaiting Clarification tab and the clocks will be stopped.