Print
Upload the Response Document
A response document is required to be loaded onto a case if the reply preference is letter. If the reply preference is email, this step is optional.
Once the response document has been completed, or the response template reviewed and updated as necessary, click on the Upload Case Response Document link.
NOTE If a Pro forma Response document is available, it will already be located in the Upload Case Response Document section. Any mail merge fields will be pre-populated using the information from Case Detail. As you make changes to the Case Details, the Pro Forma response document will be updated.
To attach the saved response document, follow the steps below.
- Click on the Attach new files... button and find the location of the saved document.
- Highlight the document and click on the Open button, or drag and drop the documents to the Upload Case Response Document area.
- In the Attach New
Files
pop up window, ensure that the Type
field says Response Document.

- Optional. Add a description of the document if required.
NOTE To add more response documents, click on the Add more files... button. Repeat steps 2 – 4 for each new document added. - Click on the Attach files to case button to save the document to the case. You will see the name of the person who uploaded the document, the date/time it was uploaded and the description (if added) will appear under the name of the document.
Additional functions for the document now become available.
Field Description Upload New Version Click on the Upload New Version link to upload an updated document, or drag and drop the new file to the relevant area. As you upload new versions of a document the View history link becomes available along with the Version number icon. For the Response Document type, the View history link is not visible as you see a list of the different Response Documents underneath the current version.
Under the name of the document, the details of who has uploaded the document, the date of when they have done this and any description that was entered will appear.Options: Download PDF Version If a Response Document has been uploaded, the user has the ability to download the document in a PDF version. Click on the Download PDF Version link to do this. Options: Edit details Click on the edit details link to change the name of the file and modify or add in a description. Once changed, click on the Save Changes button. The change will be reflected in the View History link. Options: Convert to PDF When a document is added to the case, you have the option to convert it to a PDF. If you select Convert to PDF, the document will automatically convert and will be added as a different version of that document. Options: Lock The file will be Locked so that you can work on it. If another user hovers over the Locked icon, they will see who has the document locked. 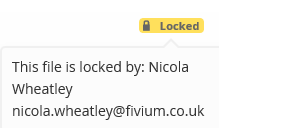
Options: Delete Click on the delete link if you would like to delete the file from the response area. Accept the delete by clicking on the OK button.
To collapse the Upload Case Response Document section click on the