Print
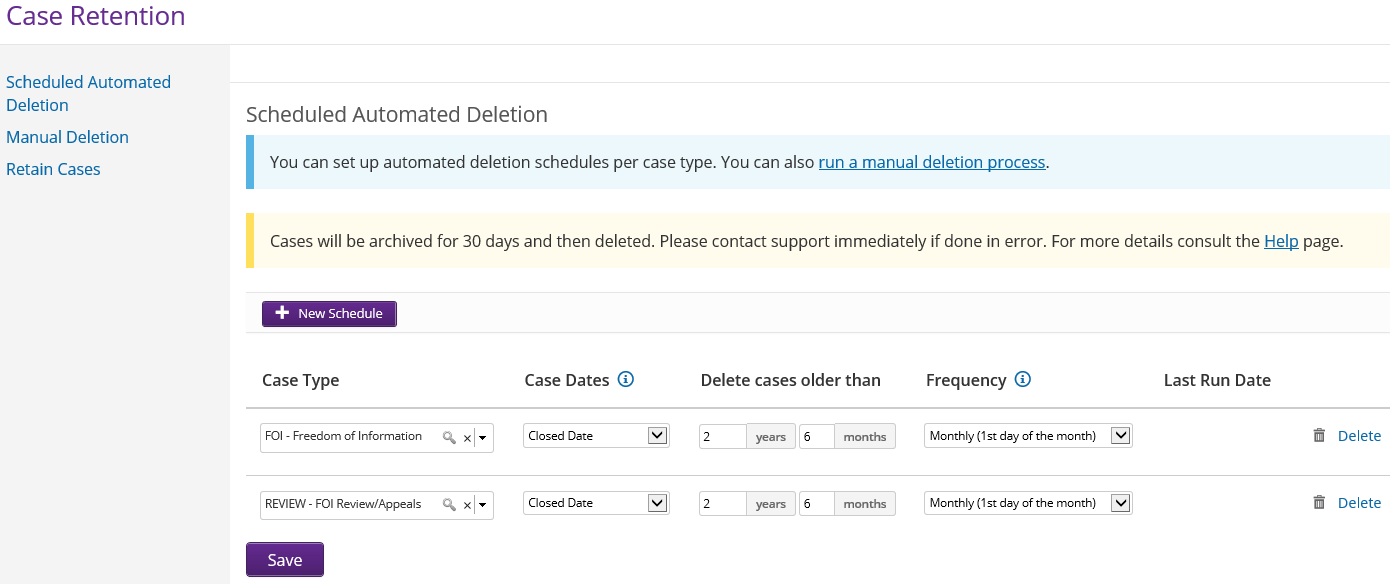
Schedule Automated Deletion
Automated deletion can be scheduled per case type. When creating the schedule, you will set the parameters for cases to be retained on eCase.
Follow the steps below to set a schedule for automatically deleting cases.
- Sign into eCase. Refer to the How to sign in to eCase section.
- Click on the eCase More menu and select Case Retention in the Management section. The Case Retention screen appears where the Scheduled Automated Deletion is the default screen.
- To create a schedule for automatically deleting case types after a certain time period, click on the + New Schedule button.
- Start to complete the schedule by selecting the Case Type from the drop down arrow.
- Next is Case Dates. Select the date you would like the schedule to work out the deletion timeframe for the case types; Closed Date, Received Date or Response Sent Date.
- In the Delete cases older than field, enter in the number of years and months the case type should be kept on eCase prior to deletion. The minimum is 1 year.
- To select the frequency of the automated deletion, click on the Frequency drop down arrow. Select whether you would like the deletion to be scheduled every day, every Sunday or on the 1 st day of every month.
- Click on the Save button to save the new automated deletion schedule. Repeat these steps until all of the Case Types have been scheduled.
To amend the schedule, update any of the fields and click on the Save button.
To delete, click on the delete link at the end of the scheduled line.