How to add an Automation Rule
To create an automation rule, select the Add Automation Rule button. The Create Automation Rule screen appears. There are several steps to be completed for an automation rule:
- Complete the Name field.
- Add in the Criteria that the rule has to match.
- Add the actions that the rule will automate when the criteria match the request.
- Review the priority order of the automation rules.
Name field
The first step is to name the rule. In the Name field, start to type out the name of the rule. The recommendation is to describe what the rule will do, for example is the rule for a particular case type only, does it allocate the case to a certain team etc.

Criteria
The second step is to define the submission criteria the rules will apply to, for example, will the automation rule apply to one case type or multiple. Does the submission include certain words or phrases, or does the submission include employment history. There are multiple criteria that can be used which can also be grouped using AND/OR rules.
To add criteria, follow the steps below.
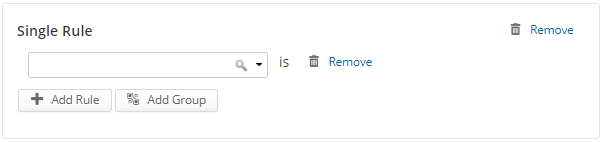
- Select the Add criteria button or the add criteria link to start to add criteria rules. By default, the Single Rule option will appear.
- In the Single Rule field, select the drop-down arrow to choose the criteria available for the rule.
The options available will depend on the fields available on your Case Types in eCase.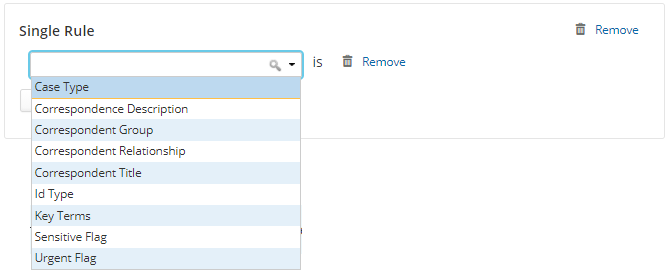
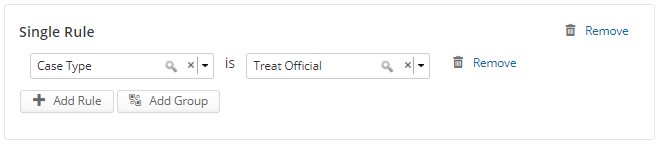
- Depending on the criteria chosen, additional fields become available, see the Criteria Options page. For example, when I add case type as a rule in my criteria, I can then select which case type it applies to.
- If the automation rule is also to be based on words or phrases that appear in the request, I can add a criteria of Correspondence Description. To do this, select the Add Rule button. This will add a blank rule field where I can select the drop-down and choose the next criteria. In this example, the Correspondence Description was chosen. The contains field then becomes available where I can add in a word or phrase that the rule has to match on the request.
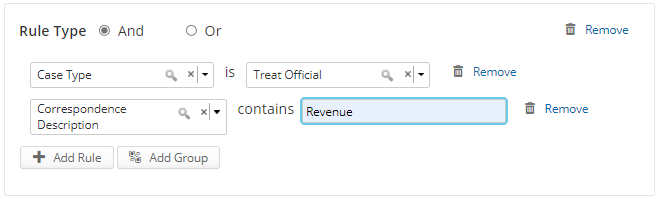
- When multiple rules are added to the criteria, the Rule Type has to be selected.

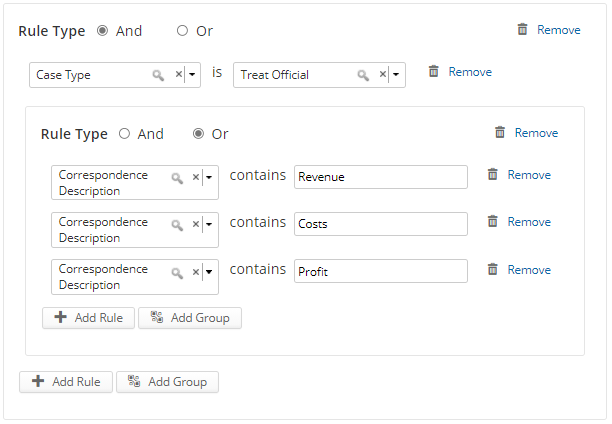
In the example above I want to match the rule to a Treat Official case type request where the correspondence description contains the word Revenue. I want both of the rules to be matched, so I will use the Rule Type of And.
An example of the Rule Type, Or, is when you add multiple rules and the request can match one or more of the criteria. In the example below if my request contains the word revenue or costs or profit, then the action will be performed.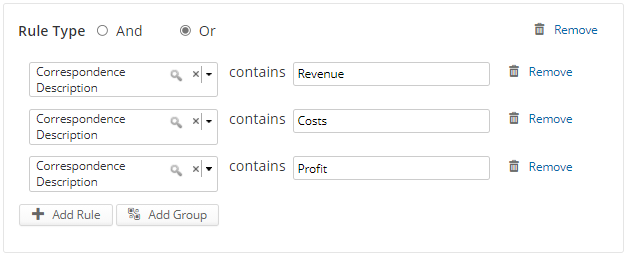
- If I want to add multiple rules to my criteria and use the And and Or Rule Types, I will need to group some of the rules together. For example, I want to match the rule to a Treat Official case type and one or more words contained in the request. To do this, I will use the Add Group button as I want to group the correspondence description criteria together.
To add a group, follow the steps below:
Step Action 1 Create a single rule by selecting the Add criteria button. 2 Select Case Type in the rule field. 3
Select the Add Group button. The Rule Type becomes available and is defaulted to And. Underneath the single rule is the indented group rules. The banner indicates that no criteria have been added yet.
4 To add a rule to the group, select the Add Rule button, or select the adding a rule link, within the indented group section. Then select the criteria. 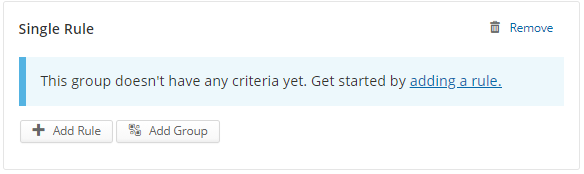
5 Once a rule has been add to the criteria, the Rule Type becomes available. This is where you can decide if the rules within the group should all match (select And) or can contain one or more of the criteria (select Or). - To remove any of the criteria on a rule, select the Remove link.
Back to Top
Actions
Once the criteria has been selected, the next step is to tell eCase what to do with the requests that match the criteria. This is achieved by adding one or more actions in the Actions section, for example I may want to allocate the request to a certain team, add in a Key Term and send out an acknowledgement.
To add actions, follow the steps below.
- Select the Add an action button or the adding an action link to start to add actions to the rule.
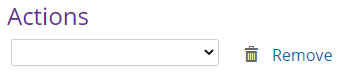
- In the Actions field, select the drop-down to view the action options that can be added to the rule. See Action Options for more details on each action and the values that can be selected.

- Add as many actions as required based on your criteria on the automation rule. To add more, select the Add an action button.
- To remove any of the actions on the rule, select the Remove link.

- Once the Criteria and Actions have been set for the automation rule, select the Create Automation Rule button. The new Automation Rule is created and will be added at the top of the Automation Rule list.
Back to Top
Priority of the Automation Rules
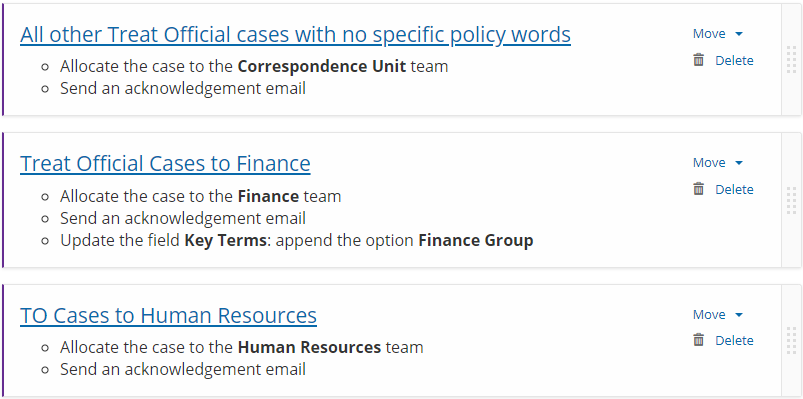
The list of Automation Rules are in priority order. For each request, eCase will start at the top of the list and will move down the Automation Rules until the criteria is met. Once the criteria is met, the action will be performed and a case created. If there are a number of rules for the same case type, ensure that the most specific rule is at the top of the list. For example, if I have criteria set up to identify key words in the request and the action is to send those requests to a certain team, the rule has to be above a generic rule to allocate all requests to a certain team.
In the screen shot below, the generic automation rule appears above the more specific rules. When a request comes in and matches the criteria on the first rule, the case will follow the actions and be assigned to that team. The more specific rules will never be used. To rectify this, I need to move the rules around in the list.
There are two ways to move the rules in the list.
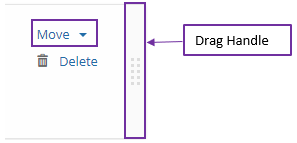
- The first is to place your mouse over the drag handle at the end of the automation rule until your mouse changes into a hand symbol. Keep your finger on your mouse and drag the rule to the location in the list that you would like it to be.
- Or, select the drop-down next to Move and choose whether you want to move the rule:
- Move to top
- Move up
- Move down
- Move to bottom
- Once you have moved the automation rules in the list you must save. To do this, select the Save button.
Review the priority of the rules every time you add a new automation rule.
- Rule 1: For all TO webforms received, allocate to the Correspondence Unit and add a Key Term of Webforms
- Rule 2: For all TO webforms received, allocate to the Human Resources Team and
add a Key Term of Employee Contract
Other actions, like adding a word or sentence to the correspondence description, adding a customer journey, adding a subject and marking the case as sensitive or urgent can only be actioned once on a request, like the team field, as the field can only contain one value.