Ministerial Correspondence Cases and Treat Official Cases
A Ministerial Correspondence (MC) case or Treat Official (TO) case can be created on eCase manually using the New Case button, or via email where you will change the 'your-eCase' with the name of your eCase domain, for example new.case@organisation.ecase.co.uk or new.case@organisation.ecase.gsi.gov.uk. If you send the email from your own eCase email address, the case will appear in your My Work tab.
Find out more…
How to manually create a case
How to create new cases via email
Standard Lines
When you create a new case, you have the ability to choose relevant Standard Lines of text that can be used as part of the response to the case on the Case Details screen. Standard Lines automatically appear based on the Key Terms, Subject or Group/Team assigned to the case, or can be manually selected.
Find out more…
How to add Standard Lines to a case
Link a Case
When a new case is added onto eCase you have the opportunity to search for any cases that are similar in nature to it. This can be through the key terms used or the contact details. It allows you to view historical information, provide consistent responses or see where multiple requests have been made by the same correspondent.
Find out more…
Watch a Case
You can watch a case at any point in the case history, or you can allocate other people as watchers. This allows you to keep track of cases that are of interest to you or other people. You can request for the cases to be shown on a Watching Cases tab on your Workbasket, or to receive email notifications as the case progresses.
Find out more…
Mandatory Clearances
Mandatory Clearances can be set on a case at any point during the case process. The clearances are highlighted so that the drafter is aware that the people/teams assigned in this area are required to quality check the case before a response can be sent and the case closed. Once the quality checks are accepted, the status of the mandatory clearances will be set to complete and the response can be sent.
Find out more…
How to add a Mandatory Clearance
Allocate a case
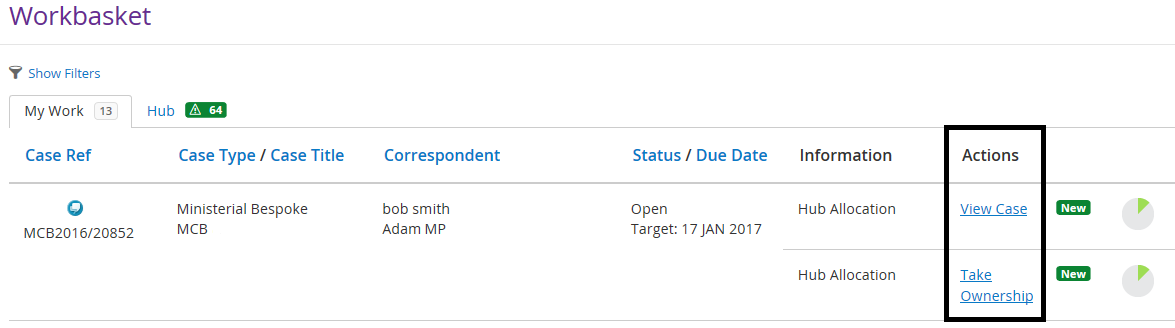
Once a case has been created, the next step is to allocate the case for investigation. If a case is allocated to a Hub, you will now see a new tab appear in your Workbasket called the Hub tab. In your My Work tab, you will see the case with the 
A new Hub allocated case:
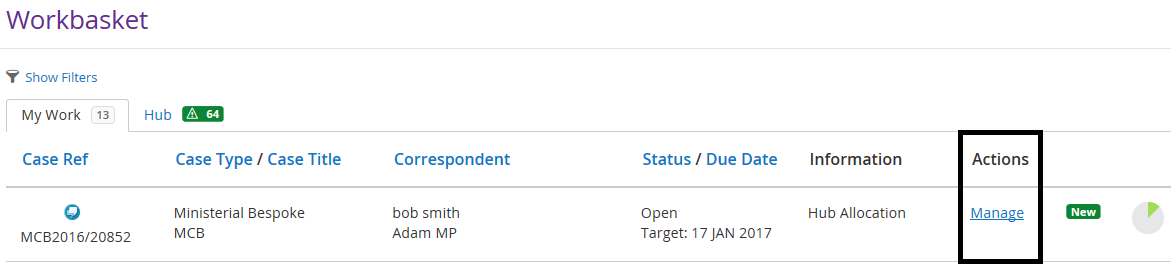
Once a Hub coordinator has taken ownership of the case, the Actions column will change to say Manage for that team member and the case will disappear from every other Hub coordinators My Work tab.
A Hub member has taken ownership of the case:
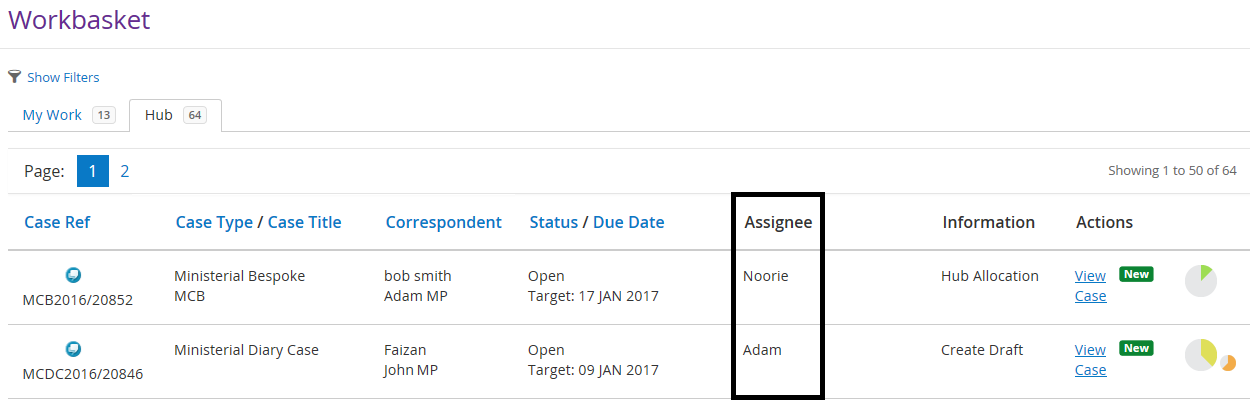
Hub tab view:
Once the Hub coordinator has reviewed and updated the case, they can then allocate the case to a drafter.
Find out more…
How to allocate a case
How to manage a case as a Hub coordinator
How to allocate a drafter
Contributions
A contribution in eCase is a request for further information, by a case owner to an advisor or specialist. The Contribution and Quality Assurance (QA) screens have been changed. Refer to the Contribution section.
Quality Assurance (QA)
To send a QA request, go to the Contributions/QA link on the left menu. Refer to the Quality Assurance section.
If you have sent the MC to a Hub, you can request a QA of the case by clicking on the Send to Hub QA button. The request and response will be recorded on the Contributions/QA screen.
Prepare a Response
The Response screen guides you through the process of preparing a response. Click on the Prepare a Response link on the left menu.
- Pick Standard Lines - select any Standard Lines that can be used in the response. Standard Lines are paragraphs of text that can be added to the response document with the mail merge [[STANDARD_LINES]] is used.
- eSignature - if you would like to use an eSignature in your response document, ensure the eSignature is uploaded in My Details and the mail merge field [[ESIGNATURE]] is in the response document you will download in the Download Response Template section.
- Download Response Template – if a response template is available you can download the document, save it and update it as necessary.
- Upload Response Document – upload the document you have prepared
Sent to Print/Prepare
After the response document has been quality checked, it can be sent to a team who have the Print/Prepare role on their user account. They can check the final version of the document prior to printing and sending it for the Minister to sign.
- Click on the Take Ownership link to become the owner of the case.
- Select the Prepare a Response document link and go to the Upload Case Response Document section.
- Review the response document. If everything is correct, print the document and click on the Case printed button. The case will move to the Printed tab.
- Once the Minister has signed the response, go to the Printed tab and click on the Manage link.
- Navigate to the Prepare a Response screen, and then the Upload Case Response Document section.
- Upload the signed version of the document by clicking on the Upload New Version... link. The signed copy of the response document is now attached to the case. You are now ready to send the response.
- Click on the Send Response section. If the reply preference on the Case Details screen is set to Letter, complete the Date Response Sent field and click on the Mark as Sent button.
- If the reply preference is email, complete the email template details:
- Email On Behalf Of – select who you would like the email to be sent from. The details in this field will come from the Configure Email Options tab in the Organisation Structure section.
- Email Template – if you have multiple Case Response Email Templates created in eCase for responding to a correspondent, then the Email Template field will appear. Select the relevant email by clicking on the drop down arrow in the Email Template field. Review the text of the emails in the Body section.
- Attachments – select which case documents you would like to send by ticking the checkbox next to the relevant document.
- Preview/Send Email button – To send the case response, click on the Preview/Send Email button. You can preview the email prior to sending the response. Once sent, the Case Response Email can be seen in the Correspondence section on the Case Details screen.
- To close the case, click on the Close Case button on the menu bar.